The performance of WordPress is affected by a number of important factors.
What follows is not a complete list, but it offers a small range of simple and free steps to enhance your Google PageSpeed Insights score and improve your Search Engine rankings.
NOTE: Choosing the right web host is probably the most influential decision for a WordPress site's speed, as it affects server response times, loading speed, and overall performance. This article, however, will concentrate on free methods, as moving to a premium host can be difficult, especially for new websites that are on a tight budget.
Step 1. Update PHP to the Latest Version
With the release of PHP 8.x, developers can take advantage of various performance upgrades, making it an even more effective tool for web development.
Taking advantage of this updated version is a simple task, just a matter of flipping a switch.
To update PHP for cPanel, all you need to do is log into your cPanel account.
To access cPanel, simply type your server’s IP address or your domain name followed by port 2083 in your web browser.
For example: https://yoursite.com:2083
Then in order to login:
- Fill your cPanel username in the Username input field.
- Fill your password in the Password input field.
Once you’re logged into your cPanel, here’s how to change the PHP version:
- First, locate the “Software” section and then selecting “Select PHP Version”.
- Then click on “Set as current”.
- Next, you just have to check your site and see if everything works properly.

Most of the new WordPress themes and plugins are designed to operate with the current version of PHP. Having an outdated plugin or theme can potentially harm your WordPress site, especially if it hasn’t been updated for some time.
So, If your website isn’t working as it should, it may be due to an outdated plugin or theme

NOTE: As long as you keep your theme and plugins updated regularly, the current PHP version should work perfectly!
2. Configure cPanel to automatically compress content for you
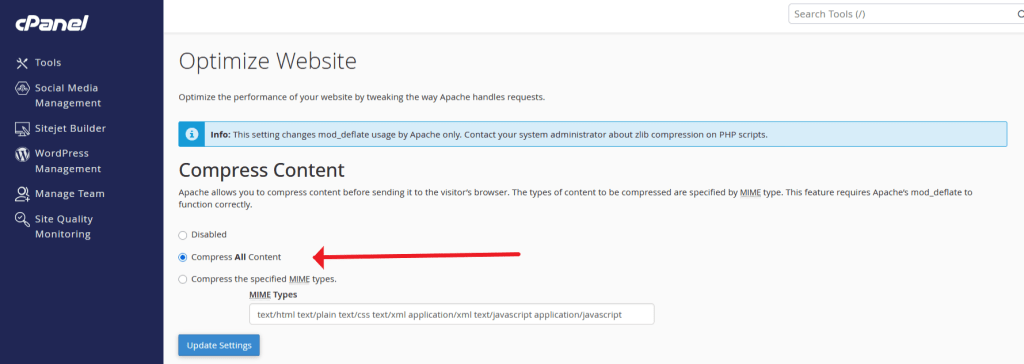
Using compression will reduce the size of the content on your site, allowing it to load more quickly. To achieve this, return to the “Software” section in cPanel and select “Optimize Website.”

Choose the option to “Compress All Content” and then proceed by clicking on “Update Settings.”
3. Optimize & minify the files on your website with a free WordPress plugin
By utilizing a free WordPress plugin like Autoptimize for file minification and optimization, you can achieve lighter files that load more quickly.
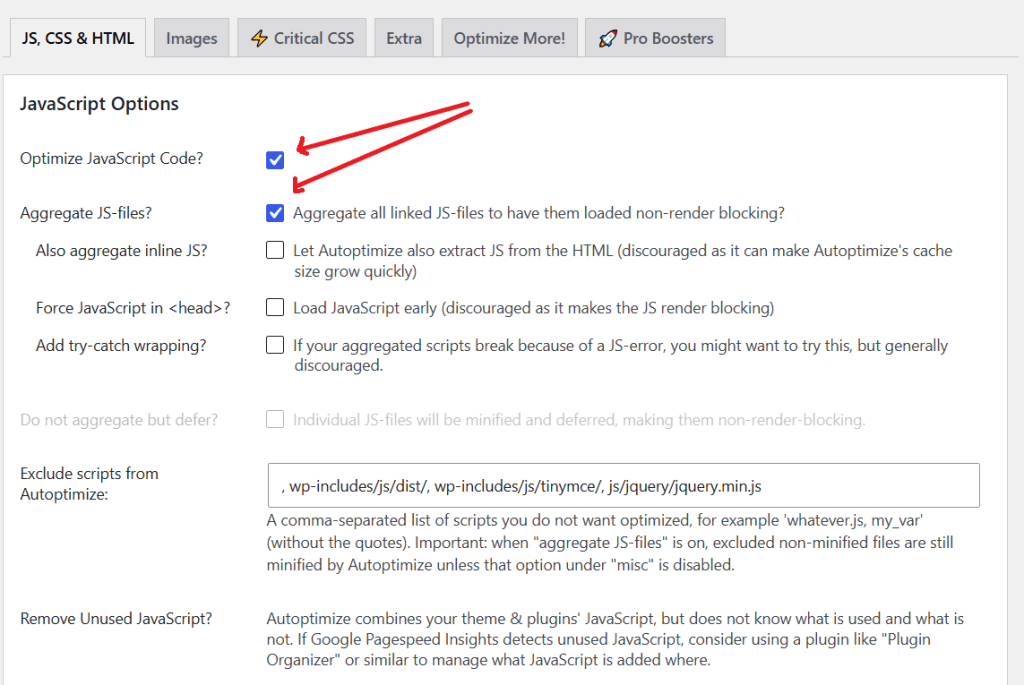
JavaScript Options
When you enable the “optimize JavaScript code” option, Autoptimize will minify your JavaScript files.
Another option I use is the “aggregate JS files” option. It enables you can combine all your JavaScript files into one file.
I usually left the other options alone.
CSS Options
Opt to minify your CSS files by enabling “optimize CSS code”.
Also with the “aggregate CSS files” feature in Autoptimize, you can merge all your CSS files into one unified file.

I usually left the rest of the options disabled
HTML Options
In this section I enable “Optimize HTML Code”
By using Autoptimize’s HTML optimization, you can minimize the size of your pages through the removal of whitespace.
By using this option, Autoptimize minimize the size of the HTML pages by removing unnecessary whitespace.

4.Another way on how increase WordPress Website Speed for free is caching
A caching plugin is important in WordPress because it stores static copies of your website pages, allowing them to load much faster for visitors. This means that when they return to your site, it loads much faster. To implement caching on your site, you can use the free WP Fastest Cache Plugin.
To access WP Fastest Cache, simply click on it in the left sidebar of the Dashboard.

In the WP Fastest Cache Options panel, in the Settings tab, enable the Cache System input box.
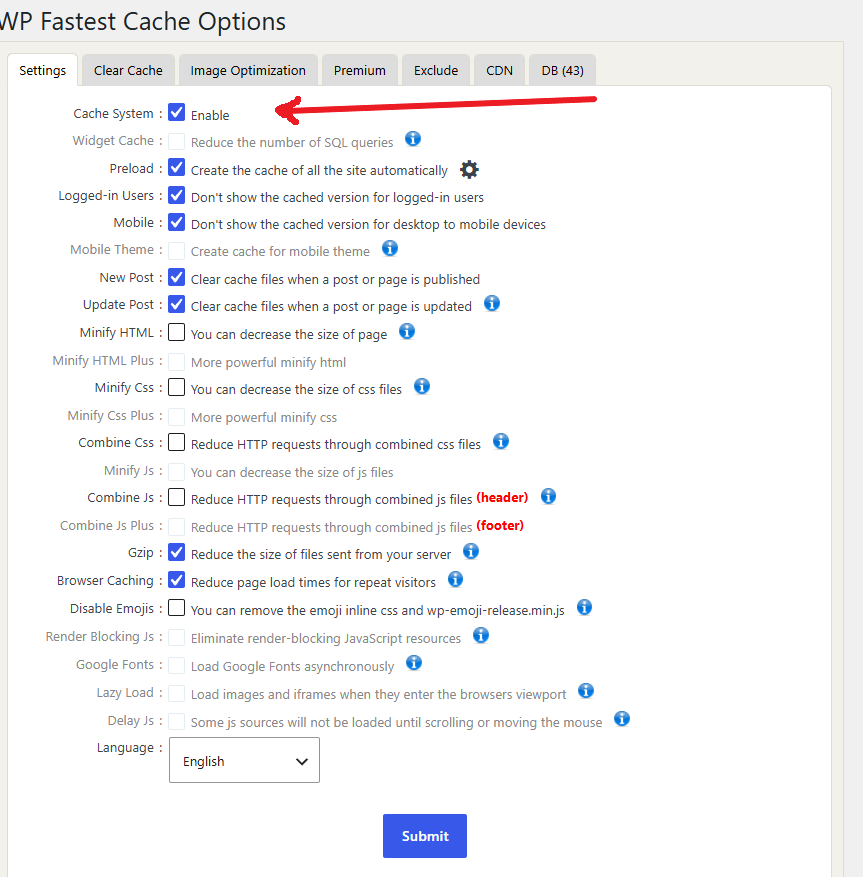
Consider selecting additional options to enhance the performance of your WordPress site.
Some recommended options to activate might include:
- Minify HTML
- Minify CSS
- Combine JS
- Combine CSS
- Gzip
- Browser Caching
Note: Grayed options and image optimizations are features that are only accessible in the premium versions.