We have talked about how an outdated or missing Certificate Authority (CA) bundle on our system can cause this error and what to do about it.
Sometimes, though, the problem is more simple.
After we have verified that it is not a certificate issue, we must look for other causes triggering the issue.
A likely candidate is a firewall in our system. https://www.kaspersky.com/resource-center/definitions/firewall
We must check Windows Defender or a third-party firewall installed in our system.
It is either the first or the latter.
In my case, it is Avast, but the process is more or less similar with Windows Defender or the other known firewalls like Norton, McAfee, etc.
Temporarily Disable Avast Firewall to Test
Just to confirm it’s an Avast issue:
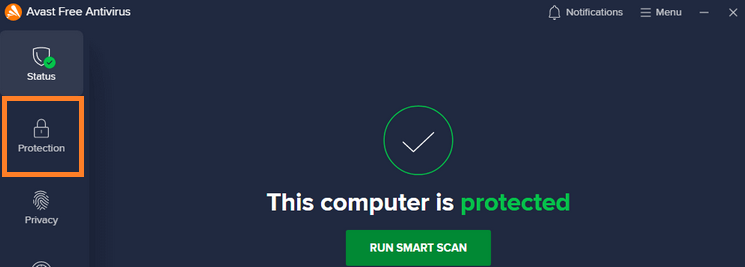
1. Open Avast
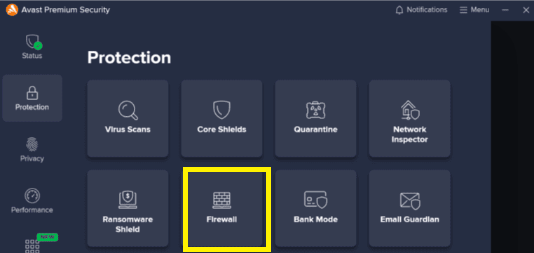
2. Select Protection tab
3. Select Firewall tab
4. Select the Disable for 10 minutes option

Try the PHP HTTPS request (like installing Composer).
If it works, then the firewall was the issue. Turn the firewall back on and proceed to create a permanent rule.
Step-by-Step: Allow PHP Through Avast Firewall
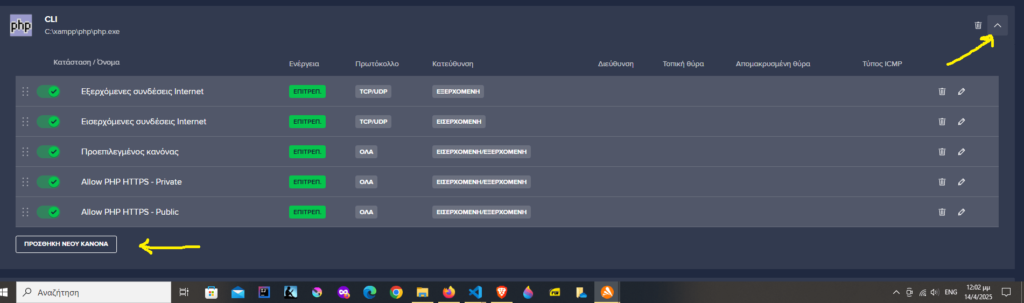
Add PHP to Avast’s Application Rules
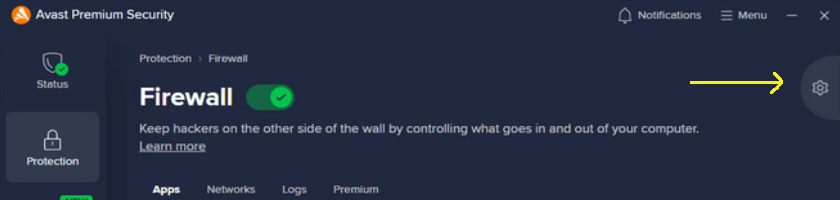
First open Avast. Click on the Avast icon in the system tray or start it from the Start menu.
Then Go to Menu > Settings > Protection > Firewall.
Now click on Settings icon.
(click on the image to open in a new tab)
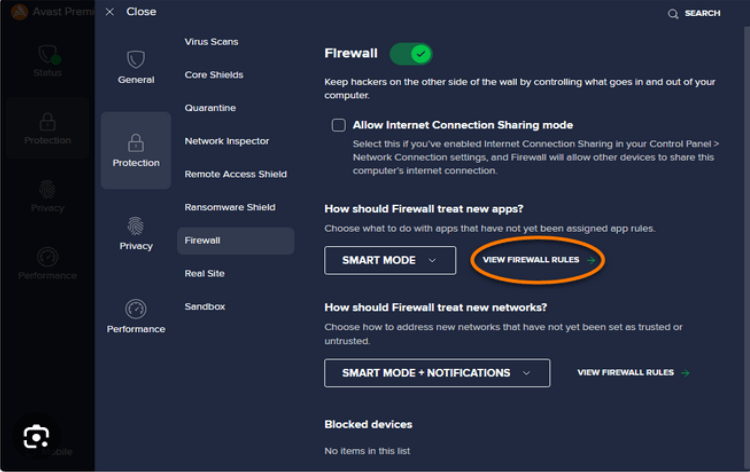
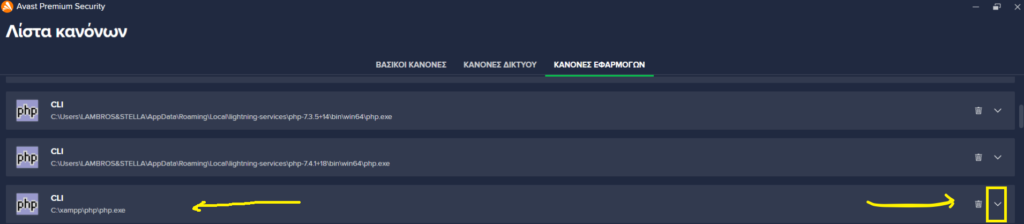
Go to the “Application Rules” tab.
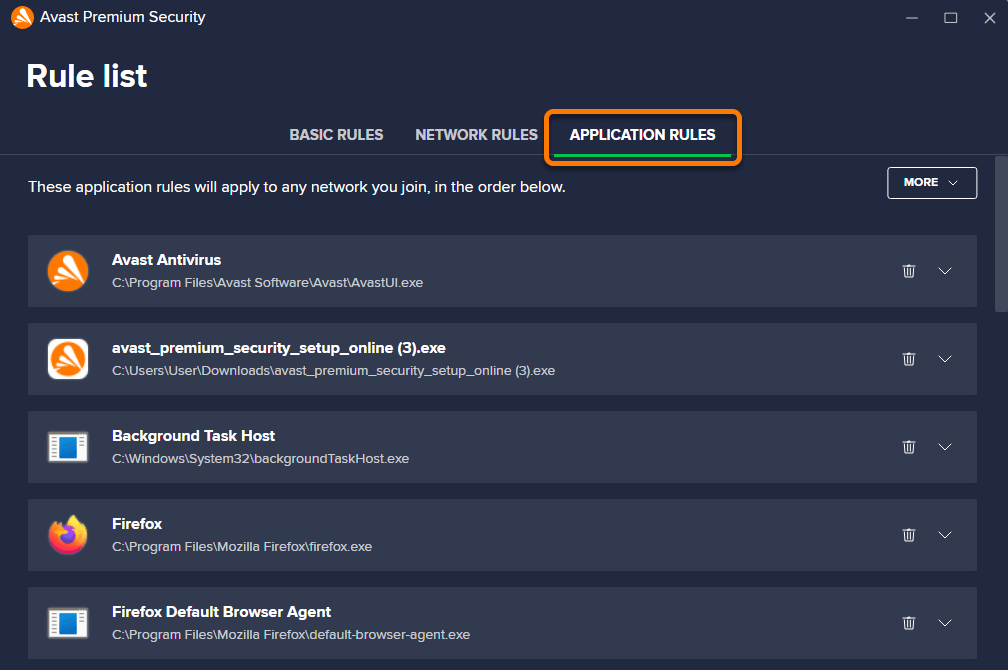
Add PHP executable
Navigate to your PHP executable.
C:\xampp\php\php.exe
Select it, and Open with the down arrow.
Click the Add New Rule button.
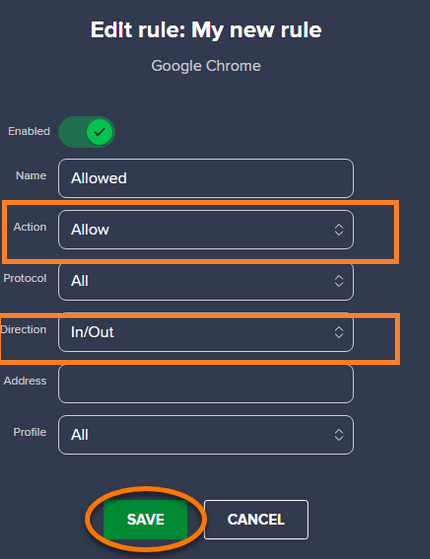
Configure Rule
A new dialog will open through which we can configure the new rule.
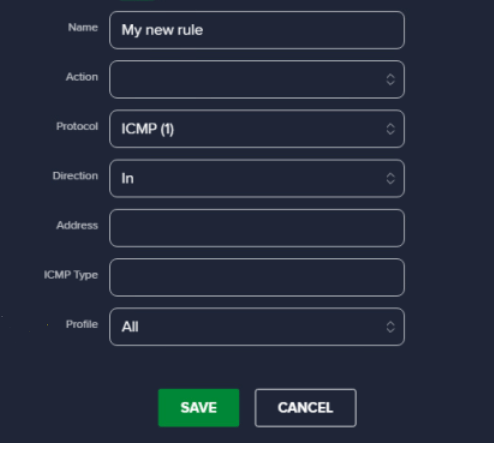
- Set profile of the network type to be All (both Private and Public). If this is not possible create two different rules, one private and one public.
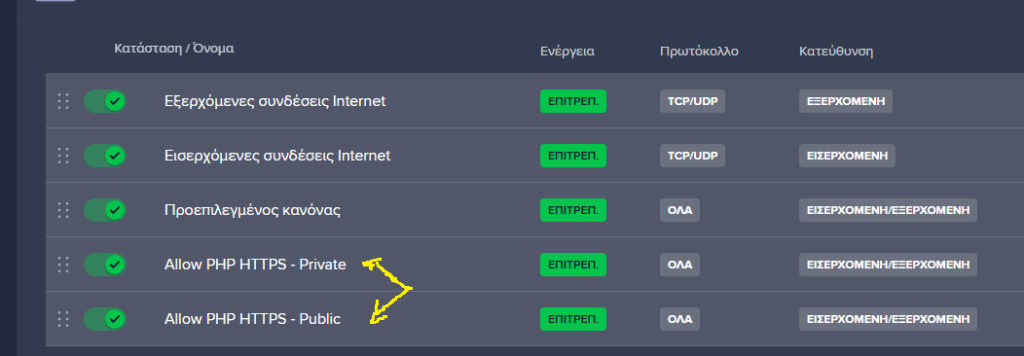
- Set all network types (Private & Public) to Allow.
- Make sure Inbound and Outbound are both allowed.
Save your changes.