CSS, which stands for Cascading Style Sheets, handles the visual presentation of a webpage on a browser.
Although a website can function without CSS, it won’t look pretty. Using CSS makes websites visually appealing and ensures a better user experience.
CSS documents are considered style sheets because they define style. But why cascading style sheets?
We are going to delve in to the process of cascade and see how it resolves conflicting CSS declarations in this article.
But first let’s talk about CSS declarations.
CSS Declarations
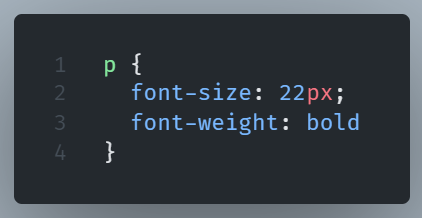
In order to style different aspects of an HTML element, like color or size, we use CSS properties.
A property declaration includes a name and a value.
The order is property name, then a colon, and then the value.

When we need to include multiple CSS properties, we separate each name-value pair with a semicolon.
CSS Rules
A CSS Rule consists of a selector and a declaration block.
We use the selector to select one or more HTML elements.
We style these elements with CSS declarations that we insert into the declaration block of the CSS rule.
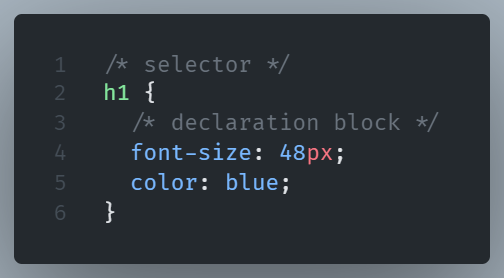
Here h1 is the selector. In the declaration block, inside the curly braces, we define the styles of the HTML element ( font-size and color in our example).
Types of Selectors
There are three types of selectors.
ID Selectors
To denote an ID selector, we use a hash sign # followed by the id name.
Each ID selector should be unique and reserved for styling a single element.
Example:
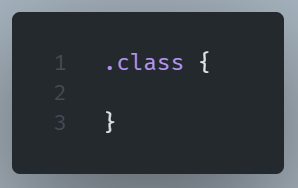
Class Selectors
To denote a Class selector, we use a period (.) followed by the class name.
A Class selector is meant to be reusable and can be applied to more than one element.
Example:
Attribute Selectors
With an attribute selector we select all elements that have this specific attribute explicitly set.
Example:
HTML
CSS

Pseudo-class Selector
A CSS pseudo-class is a selector keyword that indicates a specific state of the selected element(s).
A pseudo-class is made up of a colon (:) and the name of the pseudo-class.
Example of a pseudo-class selector:

Here, after the color we see the name of the pseudo-class whice is hover. The hover pseudo -class selects the element on mouse over.
Type Selectors
CSS Type selectors are used to match all element nodes of a given name.
Example:
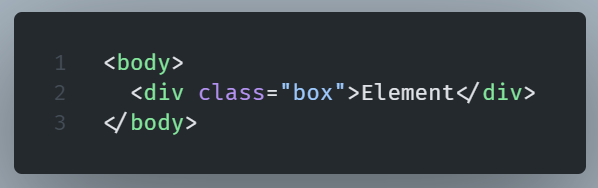
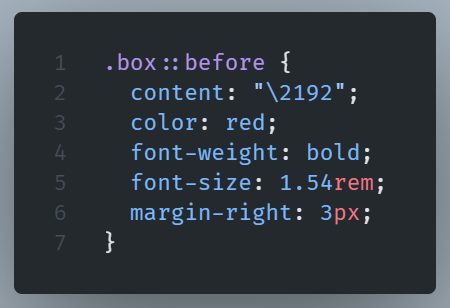
Pseudo-elements
Adding pseudo-elements is like including a completely new HTML element in the markup.
Pseudo-elements are denoted by the use of double colons (::).
Example of pseudo-element syntax:
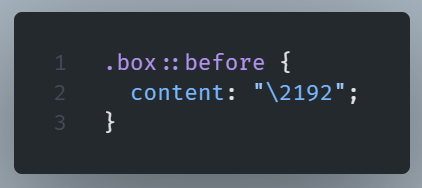
The before pseudo-element is used here along with the content property in order to insert an arrow, which can then be styled like a normal element.
HTML
CSS
Result
CSS Cascade
The ‘C’ in CSS abbreviation stands for “Cascade”.
This fact highlights the importance of the Cascade in CSS.
The cascade is an algorithm. Its purpose is to resolve conflicts when applying multiple CSS rules to the same HTML element.
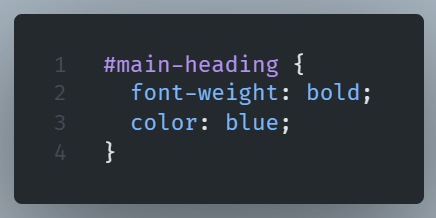
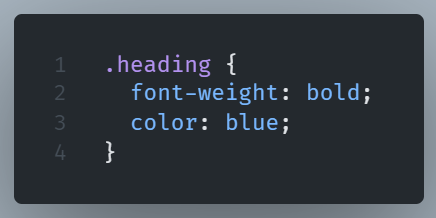
For example:

In the example, the Cascade is responsible for deciding which CSS declaration to apply in the h1 heading.
In our case, the font weight of the heading will be bold and not normal.
A declaration for a certain style property can appear several times in the same stylesheet, as we saw in our example, or in more than one source.
The Cascade resolves conflicts that may arise as a result.
The Cascade algorithm’s output is dependent on a few different factors.
Let’s examine them one by one:
Importance
Declarations labeled with !important are considered more important than normal declarations.
This is the order of importance, from most important to least important:
– User Agent (browser) !important declarations
– User !important declarations
– Author (developer) !important declarations
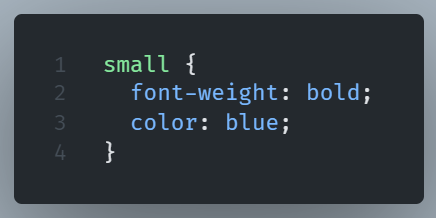
In our previous example, applying the !important label changes the order of importance and, as a result, the style of the heading.
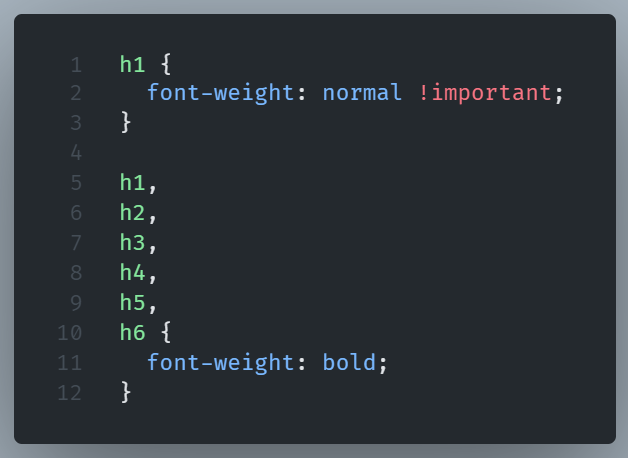
Now the weight of the heading is normal and not bold.
!important should be treated as a tool of last resort.
Overusing it could cause problems for other users maintaining the code.
Using specificity is the best practical way to anticipate conflicts, but doing so is not always workable.
There are, of course, cases where the available selectors are not sufficient to enable enhanced specificity, and changing the HTML to add additional selectors may be difficult, with a CMS that does not allow easy customization, as an example.
In cases like that, the use of the !important label may be a much more pragmatic way to achieve our goal and sustain maintainability.
Specificity
Resolving conflicts with the !important label is not the most popular nor the ideal scenario.
Most of the time, all the conflicting declarations will have the exact same importance.
In this case, the cascade resolves the conflicts by comparing the specificity of the declaration selectors. The declaration with the highest specificity prevails.
In order to calculate specificity, the algorithm uses a specificity score. The higher the score, the higher the specificity.
The specificity algorithm is a three-column value, with each column representing a different weight of importance and a different type of selector.
All types of selectors are represented in the columns with each column in the left weight more than the one on its right.
The ID selectors are represented in the first, leftmost column, the class, pseudo-class and attribute selectors in the second, and the type and pseudo-element selectors in the third column.
Example of specificity:
Let’s see how conflicts are resolved with the use of the specificity algorithm.
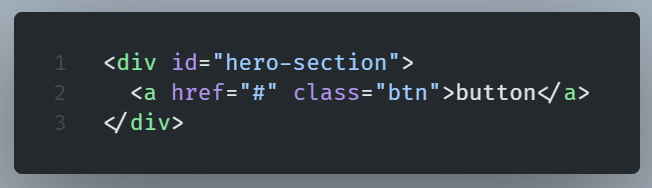
HTML
CSS
Result
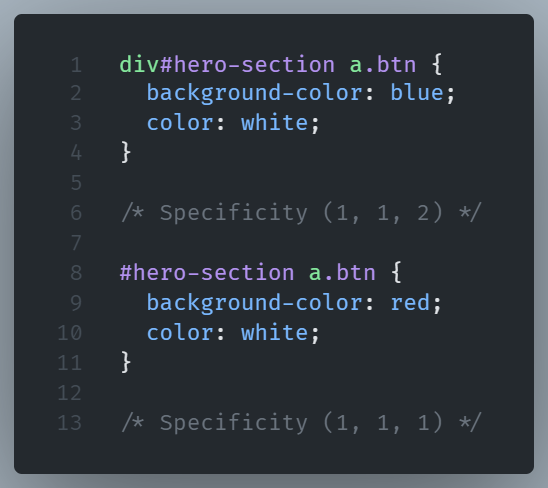
Now the first rule is the winner, since it gets more points in the third column.
The div element node added to the ‘hero-section‘ id, in the first rule, makes all the difference. It adds a second point in the type selector (third) column.
But this only matters because the score in the other two columns is a draw.
If this wasn’t the case, the third column would be irrelevant and the number of type selectors wouldn’t make a difference.
HTML
CSS

Result
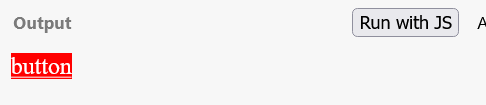
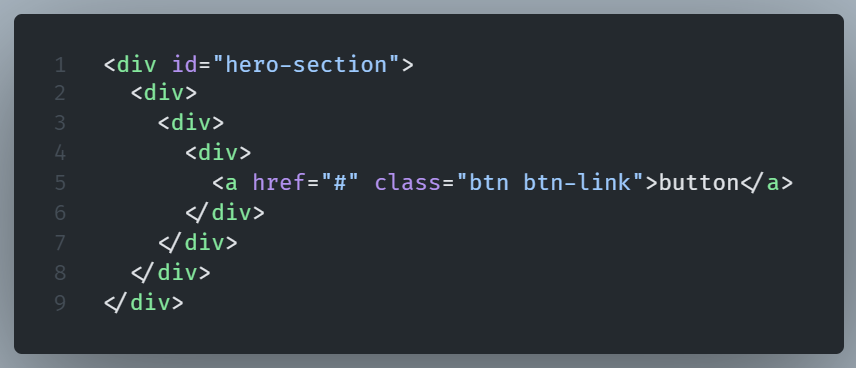
In this example, although multiple divs intervene between the first div and the link, the winner is the second rule since it gets two points in the second column thanks to the .btn-link class.
The fact that the third column type selectors in the first rule are five doesn’t matter.
It wouldn’t make any difference if a hundred type selectors were denoted in the rule.
From the example, it is obvious that there is no meaning in evaluating the specificity score from right to left.
We do the opposite.
First, we compare the leftmost column (ID) and only if the score is a draw we move to the one on the right and so on.
The value of the winning declaration is the cascaded value.
The cascading value for the background property in the previous example is red.
Regarding the pseudo-class‘s specificity
The :is(), :has(), and :not() pseudo-classes don’t add any specificity weight, making them an exception to this rule.
But the parameters in these selectors add specificity weight, which depends on parameters specificity weight.
HTML

CSS
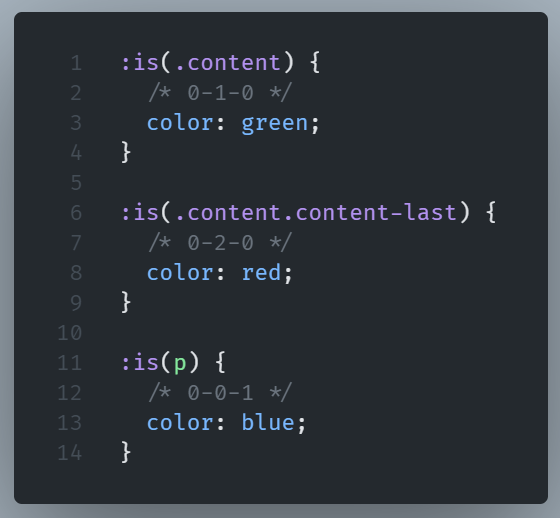
Result
The cascading value of the color property in the above example is red.

Universal Selector and Specificity
The universal selector selects all the elements on a HTML page and applies the same style to them, as long as there is not a more specific rule applied.
It is represented by the Asterisk(*) symbol:
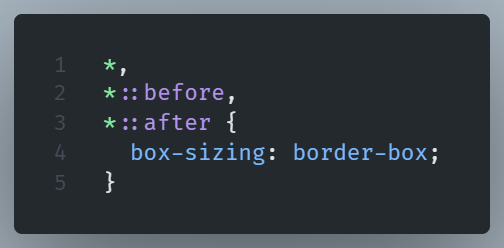
The above code dictates that padding and border should be included when calculating the width and height of every element in the page.
The universal selector becomes handy when we want to apply a CSS reset.
A CSS reset is a set of styles we apply in order to remove browser built-in styles.
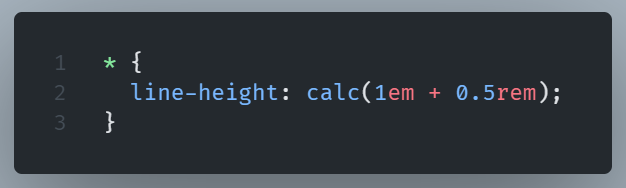
Apart from manipulating the box-sizing model in the above example, a very common and useful case of using the universal selector for resetting CSS is the removal of the default margin:

The universal selector is also handy when we need to manage line heights.
The line-height controls the vertical spacing between each line of text in a paragraph.
Regarding specificity, the universal selector holds no specificity value or, more accurately, a specificity value of (0,0,0), so :
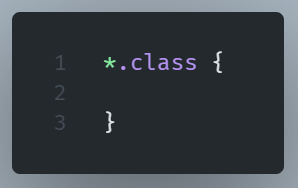
and
have the same specificity.
Inline style attribute
The highest specificity is given to inline styling, so it always takes precedence over internal or external CSS rules.
HTML

CSS

Result
Now, we see the cascade ignores the external CSS rules and applies the style attribute values in the HTML file.
But what happens if selectors have the same specificity?
If there is a tie at this point, then the order of appearance is taken into account.
The last declaration in the code (top to bottom) will override all other declarations and will be applied.
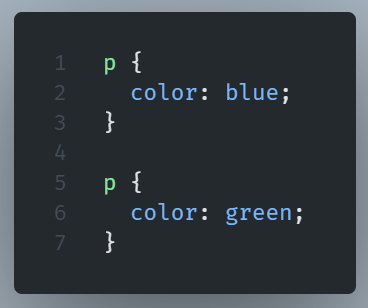
The paragraph will be written in green. The newest instance wins.
NOTE: It is considered best practice to rely more on specificity rather than on the order of appearance. In the case of rearranging our code in the future, we won't mess up our styles.
Let’s see an example:
HTML
CSS
Result
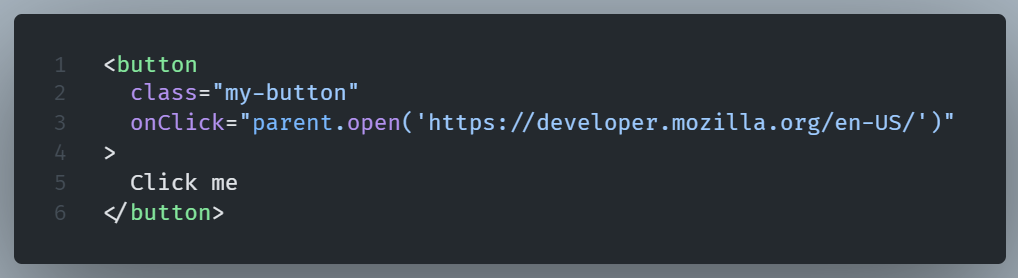
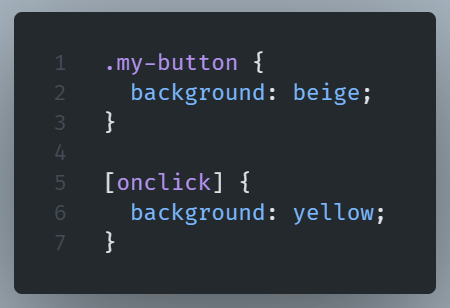
In our example, onclick attribute fires on a mouse click on a specific button linking it to a specific webpage.
We want to style this button differently from the others.
The button’s background is yellow because of the equal specificity score (0-1-0) of both selectors.
We rely on the order of appearance to color the specific button yellow.
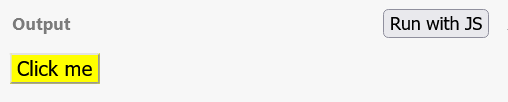
But if we rearrange the code and the rules change order, the button may unintentionally become beige.
CSS
Result

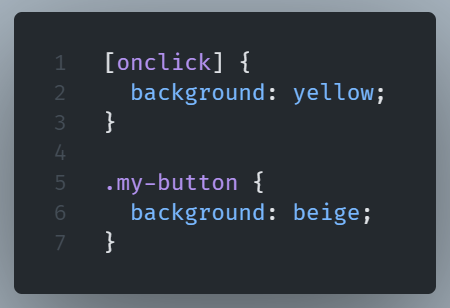
We can make our code rely more on specificity to achieve the same result without relying on the order of appearance.
CSS
Result

Now rearranging the order wouldn’t cause any problem.
Rely on order when using 3rd party stylesheets
When we use external 3rd party stylesheets, we need to rely on the order of appearance.
To overwrite styling from other CSS files, remember to include your CSS file after the ones you want to override. Make sure your custom stylesheet is placed AFTER these stylesheets in the head section.
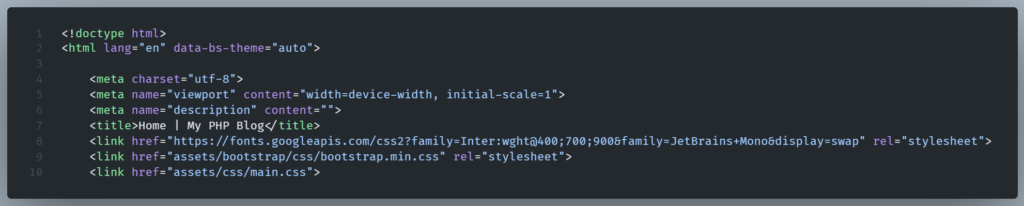
In the example, we have placed our custom stylesheet ‘main.css‘ after the bootstrap and google fonts stylesheets.
And now we can overwrite the bootstrap default link color with one of our liking.