We are going to construct a very simple MVC framework to get the concept.
The code will be built and run locally with XAMPP. Those using Macs can use MAMP for the same purpose.
Having a database and web server installed on your computer is the easiest and most affordable way to experiment with code.
Although we can administer the database for this project from the phpMyAdmin panel in our XAMPP application, we are going to do this from PowerShell.
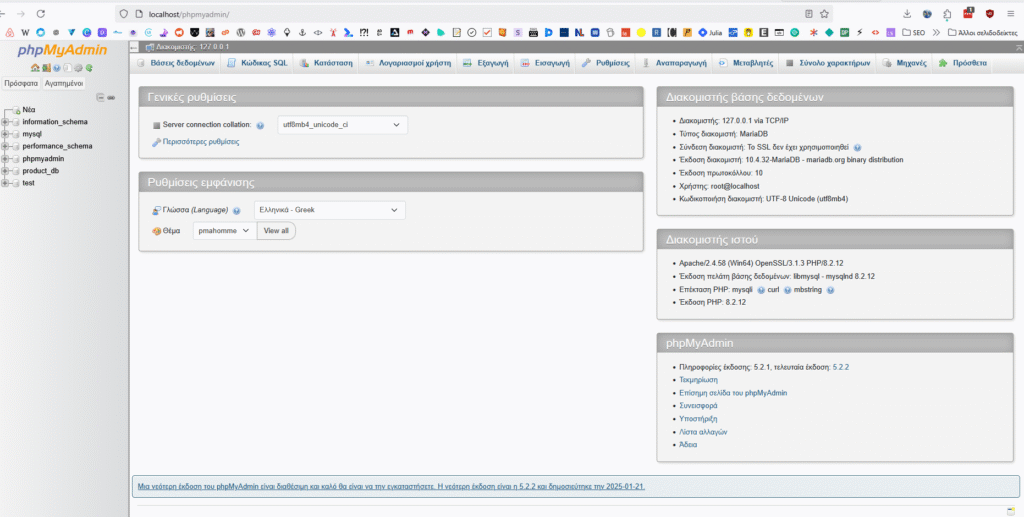
Using PowerShell we are going to access a MySQL client. The MySQL client is a typical name for programs used to connect to MySQL Server.
Follow these steps:
- Open PowerShell
- Go to the directory containing the mysql.exe file. On Windows, it’s located in the “mysql” folder, under the “bin” folder:
cd C:\xampp\mysql\bin - Connect to MySQL as the root user by running this command:
& ".\mysql.exe" -u root -p. You will be asked for your password. Since the root account has no password by default, just press enter.
You can now access MySQL databases from the command line.
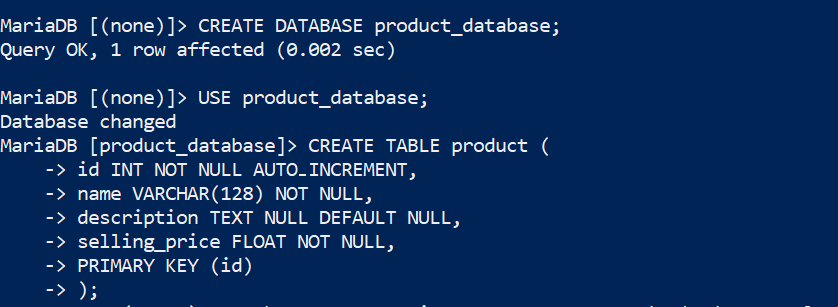
Creating the database and table
We begin by making a new database, which we’ll call product_database. Next, we will select that database and create a table called product.
After that, we populate that table with the desired fields.
Then make a user for the database, label it product_user, and provide a password.
We give the user full permissions on the new database.

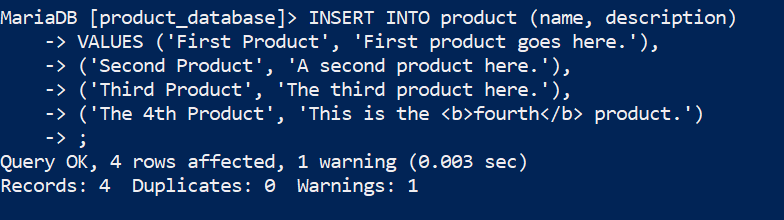
After that, we’ll add some sample data to the table.
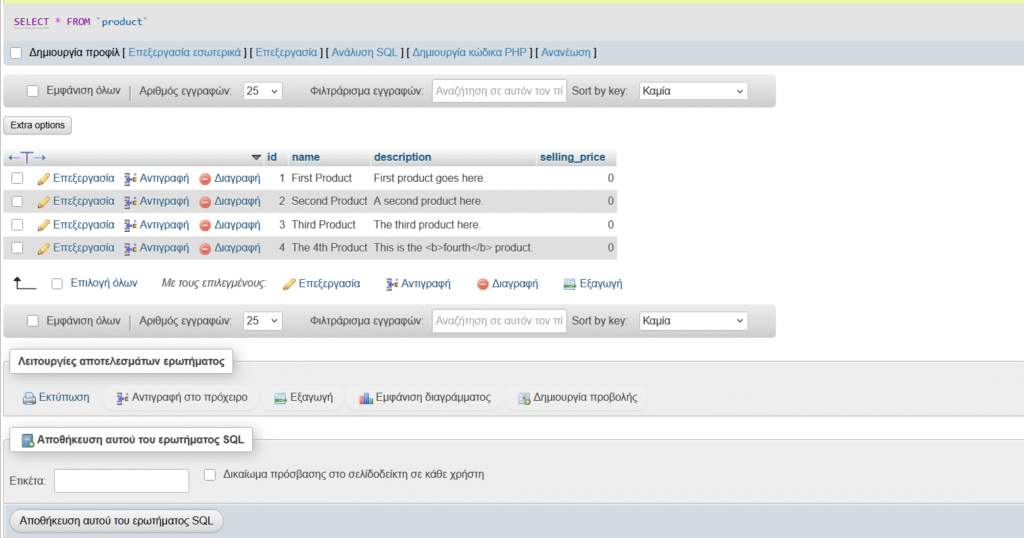
Here’s the table in the GUI with our chosen columns and the added records.
The MVC pattern explained
We start by writing some PHP code and then we are going to refactor this code according to the MVC pattern.
Database connection
We first start by generating a file named index.php.
Our goal is to get data from the database and display it.
We establish a connection to the database. PDO is what we use for this.
Then we create a string to guide PHP on how to connect to the database.
We store this string in a variable named $dns.

Dissecting the code:
mysql:→ we’re using MySQL.host=localhost→ the database runs on a local machine.dbname=product_database→ the name of the database.charset=utf8→ use UTF-8 encoding (good for handling all kinds of text).port=3306→ the default MySQL port.
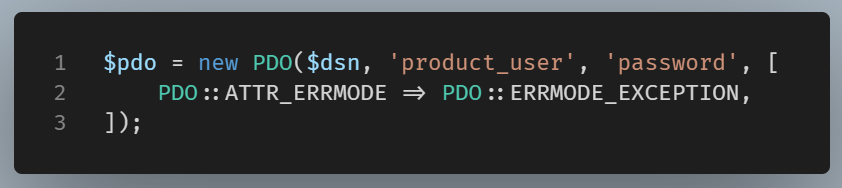
Then we create a new object passing in the $dsn variable, the username, and the password we have already created. We also set up PDO to throw exceptions on errors.
Let’s see what is going on here:
new PDO(…): Creates a PDO (PHP Data Object), which is the modern way to connect to databases in PHP.
product_user and password are respectively the username and password for the database.
PDO::ATTR_ERRMODE => PDO::ERRMODE_EXCEPTION: This makes sure that if something goes wrong, PHP will throw a clear error instead of silently failing.
At this point, $pdo is the connection to the database.
We are now able to obtain some data from the database.
We call the PDO::query() method on the $pdo object.
This method prepares, executes, and returns an SQL statement as a PDOStatement object.
The SQL we pass here is for selecting all the records from our table.
We are going to store the returned statement in the $stmt variable.

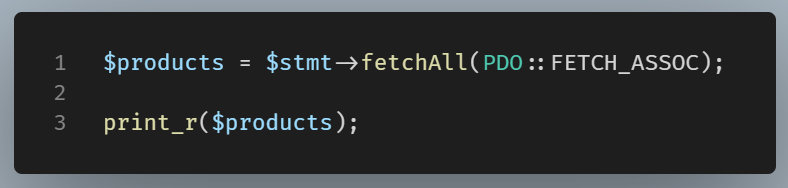
We’ll use the fetch all method on this statement object, using the constant to retrieve the data as an associative array.

We print this out using the print function to see where we are at the moment.
In order to do this we store this associative array to a variable named $products.
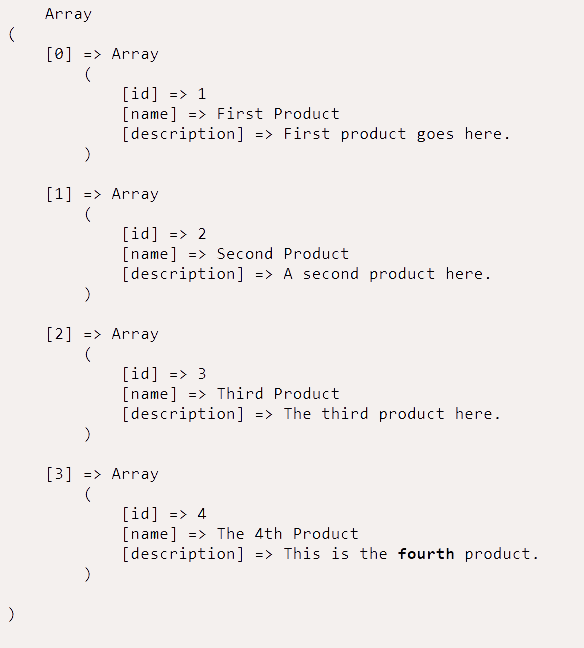
Running this script in your browser and inspecting the source code, will display an array of all product records.
Once we have checked that we can get data from the database, we can display it using HTML.
We add a heading in the body section.
After that, some PHP will loop through the products, showing the name and description columns of each record.
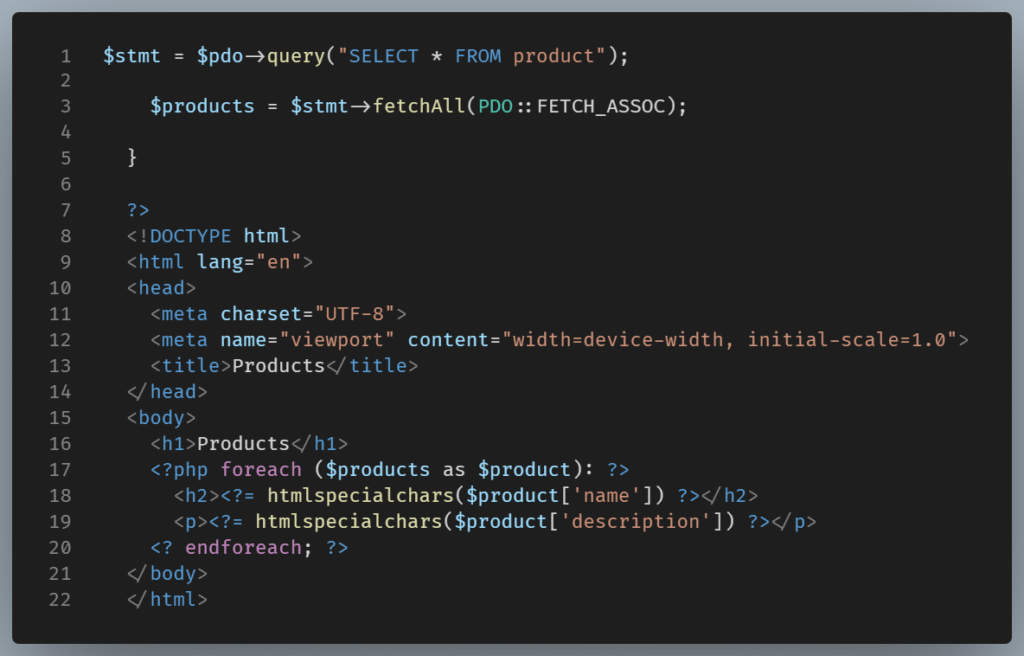
We loop using the foreach loop which the most common way to loop through the items of an array.
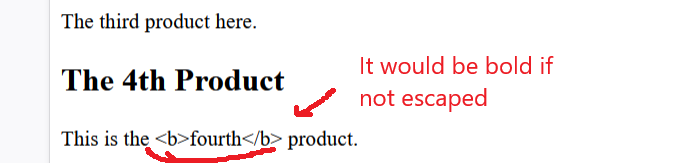
NOTE: We need to escape the retrieved data. Since this data is supplied by users, it may contain malicious code, so we need to escape any special characters it might contain. We do this by using the htmlspecialchars() function.
By refreshing the browser, the data appears in HTML format.
We see that the fourth listing contains some HTML code, and since it is escaped, the literal value is displayed instead of the code being interpreted by the browser ( the word fourth would be bold in that case).
Restructuring the Code with the MVC Pattern
This is standard PHP code that combines database data fetching and HTML data presentation.
This works well for short scripts like that. However, it can be hard to maintain this code when your app expands, as it becomes tangled with the presentation code.
We are going to apply the MVC pattern and organize this code into three separate parts: models, views, and controllers.
The Model
First, start by creating the model.
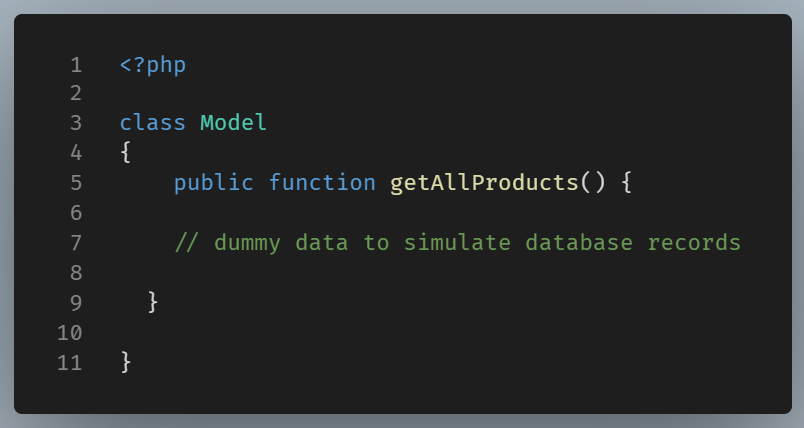
Let’s make a file named model.php and put in the PHP opening tag.
This is meant to be a Class.
We define the class, which we call ‘Model’.
Notice that the class name is capitalized. According to the coding standard, Classes should use StudlyCase. Methods, on the other hand, should use camelCase.
We use this Class for retrieving products, so let’s add a new public method called getAllProducts.
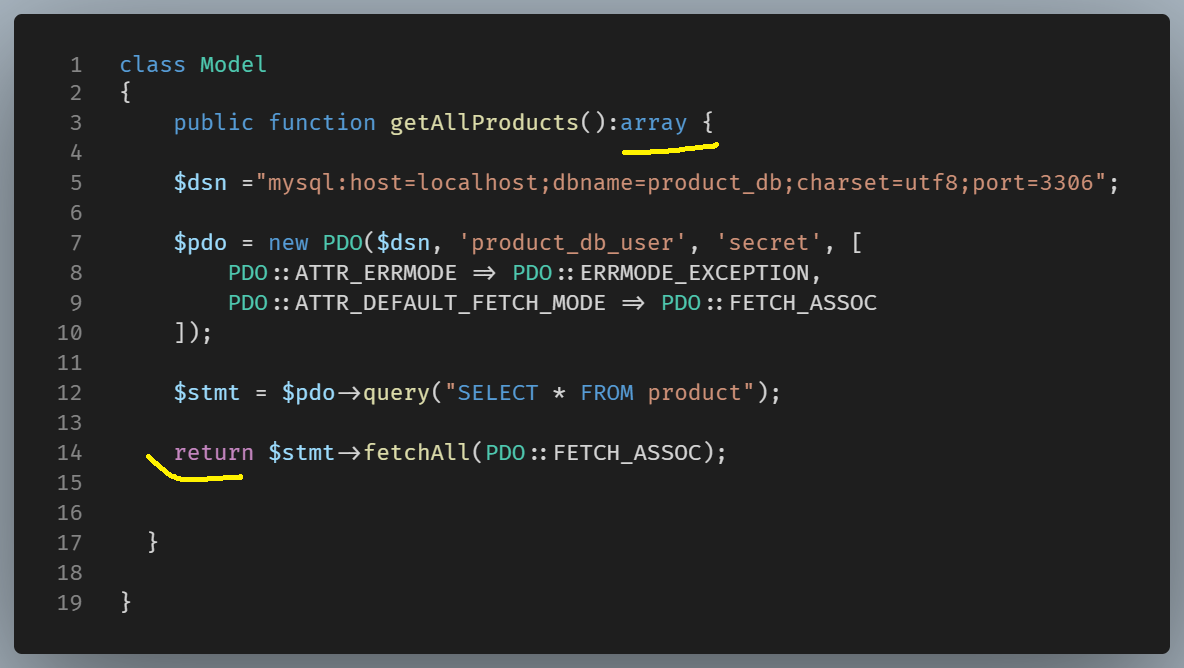
We take the code that gets the products from the database from the top of the index.php file, and then we paste it into the getAllProducts method.
At the end of this method, instead of assigning the data to a variable, we return it. This method will return an array.
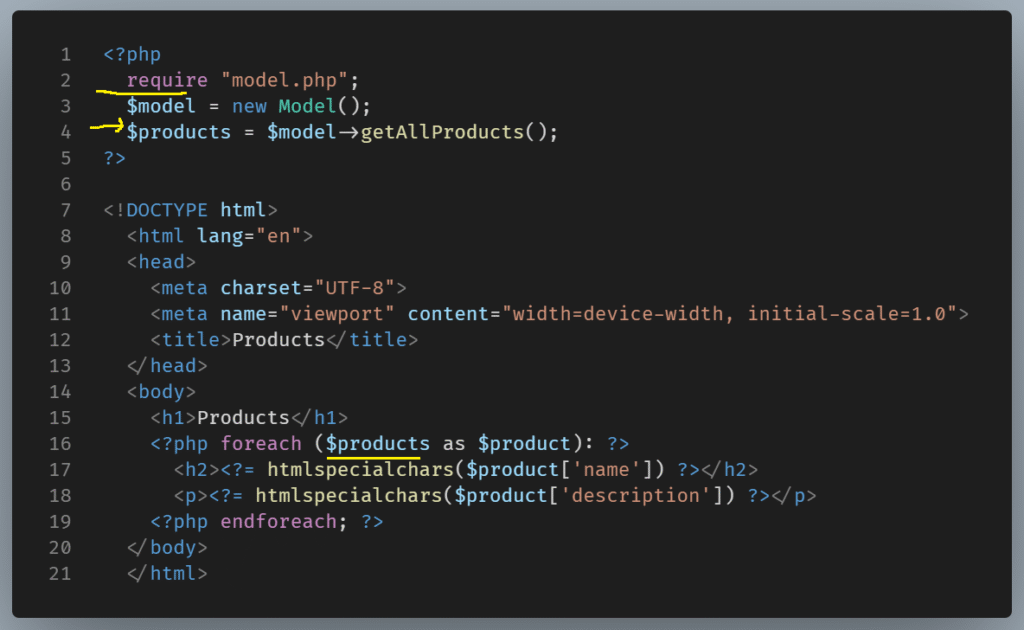
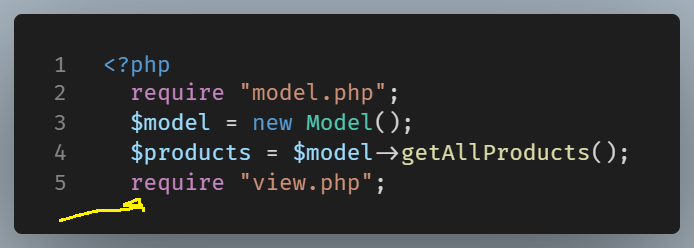
Now, let’s go back to the index.php script to use this Class.
We need to require the file that the Class resides in . This is the Model.php file.
Following that, we instantiate an object, call the getAllProducts method on that object, and lastly we store the returned value to a variable.
This variable retains its previous name ($products), allowing direct use in the loop.
The View
Next, let’s extract the View’s code.
In a View file, we use the code needed for presenting the data.
This is the HTML with minimal PHP needed for displaying that data within HTML.
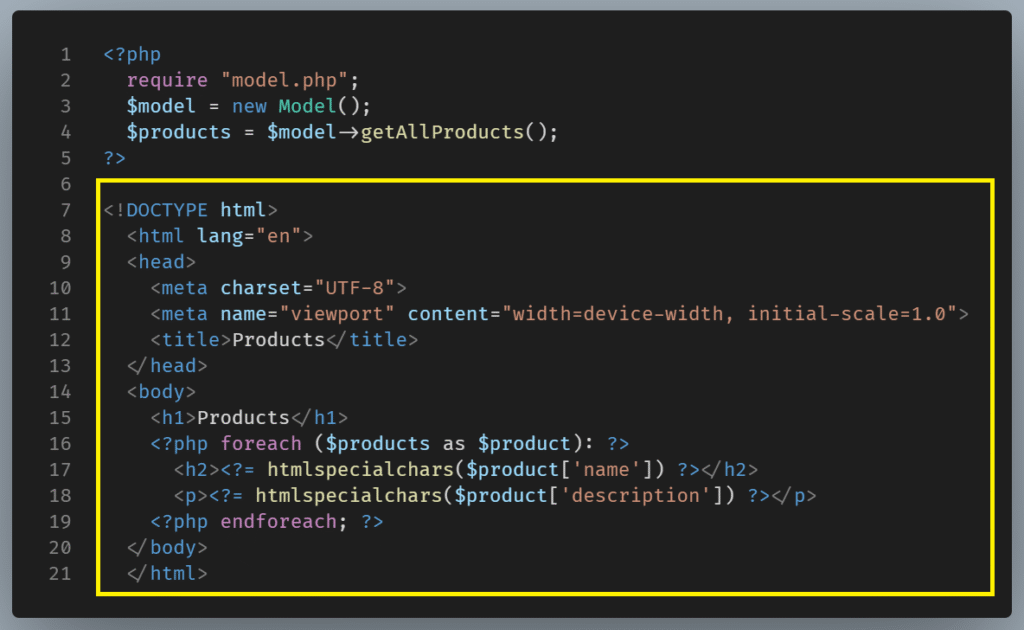
We create a new file and name it view.php.
Then remove all of this code from index.php and move it there.
In order to use this view file, we return back into the index.php file and require it.
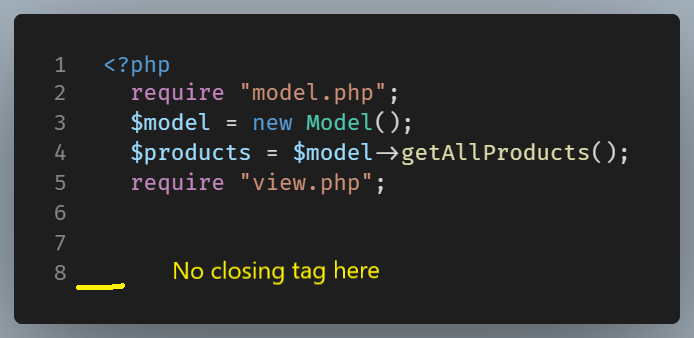
Note that the index.php file now includes only PHP.
No HTML is included.
The PHP closing tag should be left out of PHP-only files, according to the Extended Coding style guide.
The Controller
And last, we can extract the code for the controller.
The job of the controller is to handle the request and send back the response.
At the moment, we do exactly that in the index.php.
But we want to extract this code out into a Class, exactly as we did previously with the model file.
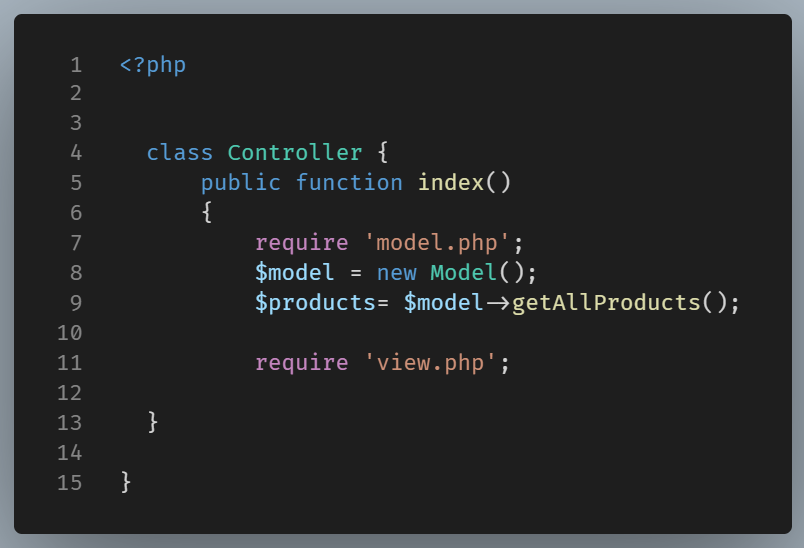
In order to do that, we’re going to create a new file and name it controller.php.
In this file, we add the class definition for a Class named Controller.
Inside the Class, we add a public method called index, which includes the code on the index.php page.
We should note here that methods inside contollers are known as actions.
We add the code inside the index action here.
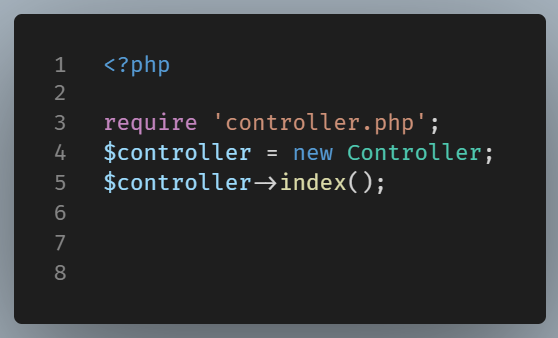
Then, let’s include the Controller Class file on the index page.
We also create a new controller object and call the index method on it.
Concluding
We’ve separated the PHP script into a model, view, and controller.
The model processes the data.
The view presents it, while the controller handles the user’s request and responds using the model and the view.
For a script this small, this hasn’t helped much yet; it will be clearer when more pages and functionality are added to it.
In practice, a project has many files that are organized in separate folders.
